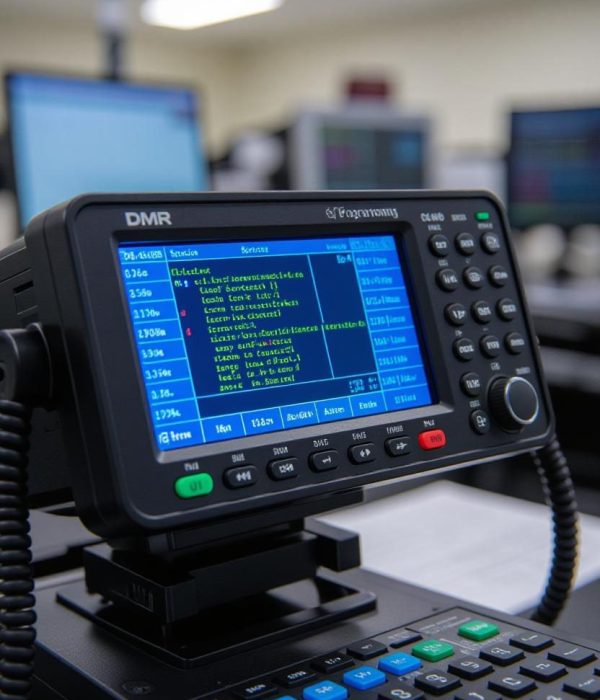
Digital Mobile Radio (DMR) has revolutionized amateur radio communications, offering crystal-clear audio and efficient spectrum use. However, the journey from unboxing your new DMR radio to making that first contact involves a learning curve that can intimidate even experienced operators. Understanding the programming process and its underlying concepts transforms this seemingly complex task into a manageable project that opens doors to worldwide digital communication.
Understanding the DMR Difference
Unlike traditional analog FM radios where you simply dial in a frequency and start talking, DMR radios require structured programming that tells them exactly how to behave on each channel. This isn’t arbitrary complexity – it’s necessary for DMR’s advanced features like dual-timeslot operation, talk group routing, and networked repeater systems.
Think of programming a DMR radio like setting up a smartphone versus an old rotary phone. The rotary phone just needed a connection to work, while your smartphone needs configuration for contacts, apps, and networks. Similarly, DMR radios need detailed instructions about color codes, timeslots, talk groups, and contact lists to function properly within the digital ecosystem.
The good news is that once you understand the fundamental concepts, the actual programming becomes a logical process of filling in the right information in the right places. Most frustration comes from not understanding what the various settings do, rather than the actual complexity of entering them.
Essential DMR Concepts Before Programming
Before opening any programming software, you need to understand five key concepts that form the foundation of every DMR configuration.
Color Codes function like CTCSS tones in analog radio, preventing you from hearing traffic from other repeaters on the same frequency. DMR uses color codes 0-15, and you must match the repeater’s color code exactly to access it. Unlike analog tones, there’s no scanning function – an incorrect color code means complete silence.
Timeslots represent DMR’s party trick of supporting two simultaneous conversations on one frequency. Each repeater channel operates with Timeslot 1 and Timeslot 2. Different talk groups typically use different timeslots, and programming the wrong slot means you won’t be heard, even if everything else is correct.
Talk Groups are virtual rooms where specific groups of users gather. Local talk groups might connect repeaters within a city, while worldwide groups like TG 91 connect thousands of repeaters globally. Your radio needs to know which talk groups to transmit on and which to receive, requiring careful programming of both TX and RX lists.
Contacts in DMR aren’t individual people but rather the talk groups and private IDs you’ll communicate with. Each talk group needs to be programmed as a contact with its specific ID number. These contacts then get assigned to channels to determine what happens when you press the PTT button.
Zones organize channels into manageable groups, similar to banks in a scanner. Since a DMR radio might have hundreds of channels programmed, zones let you group related channels together – perhaps all repeaters within driving distance, or all channels for a specific talk group across multiple repeaters.
The Code Plug: Your Radio’s Brain
The configuration file that contains all your programming is called a “code plug,” terminology borrowed from commercial radio programming. This single file contains everything your radio needs: frequencies, talk groups, contacts, zones, and various operational settings. Understanding code plug structure is crucial because it determines how you’ll interact with your radio daily.
A well-organized code plug follows logical patterns. Many operators structure their code plugs geographically, with zones for different cities or regions. Within each zone, channels might be arranged by repeater, with different talk groups on that repeater occupying sequential channels. Others prefer organizing by talk group, with zones dedicated to specific groups across multiple repeaters.
Starting with a template code plug for your area, often available from local DMR groups or repeater owners, can jumpstart your programming. These templates include local repeater information, common talk groups, and proper settings for your region’s DMR network. However, don’t just load and go – understanding what’s in that template helps you modify it for your needs and troubleshoot problems.
Software and Tools
Every DMR radio manufacturer provides programming software, often called CPS (Customer Programming Software). While functional, these programs often reflect their commercial radio heritage with interfaces that prioritize features over user-friendliness. The learning curve can be steep, but understanding the software’s logic makes the process manageable.
Third-party tools have emerged to simplify DMR programming. Software like DMRconfig or qDMR provides friendlier interfaces and works with multiple radio brands. Online tools like RadioID.net maintain databases of repeater information and user IDs, providing crucial information for building code plugs.
Before programming, you’ll need your DMR ID – a unique seven-digit identifier that functions like a callsign in the digital world. Register for free at RadioID.net, and you’ll receive your ID immediately. This number gets programmed into your radio and identifies your transmissions on the network.
Step-by-Step Programming Process
Start by installing your radio’s programming software and connecting the radio with the appropriate cable. Most DMR radios use standard USB cables, though some require specific models. Read your current configuration first – this creates a backup and shows you the existing structure.
Begin with the basic radio settings: your callsign, DMR ID, and intro screen information. Set your programming preferences like timeout timers, power-on messages, and backlight behavior. These personalization options make the radio truly yours while ensuring proper operation.
Next, create your contact list. Add talk groups you’ll use, entering their names and ID numbers. Common groups include Local 9, Regional, and various special interest groups. Don’t go overboard initially – start with 10-15 commonly used talk groups and expand as needed.
Program your channels by combining frequencies, color codes, timeslots, and contacts. Each channel represents a specific talk group on a specific repeater with all necessary parameters. Double-check every entry – a single wrong digit in a frequency or color code renders the channel useless.
Organize channels into zones that make sense for your operating style. Create RX lists that determine which talk groups you’ll hear on each channel. Many operators create multiple versions of the same repeater with different RX lists – one for all talk groups, another for just local traffic.
Testing and Refinement
After uploading your code plug, test systematically. Start with simplex channels to verify basic transmit and receive functionality. Progress to repeater channels, checking that you can access the repeater and that your audio is clear. Join different talk groups and confirm you’re being heard where expected.
Monitor the network before transmitting. Listen to existing conversations to understand traffic patterns and etiquette. Use your radio’s promiscuous mode to hear all talk groups on a repeater, helping you understand what’s available and active in your area.
Refine your programming based on actual use. You’ll quickly discover which talk groups you actually use versus those that seemed interesting initially. Adjust RX lists to reduce unwanted traffic while ensuring you don’t miss important communications. This iterative process continues as your operating patterns evolve.
Common Programming Pitfalls
The most frequent programming error involves mismatched timeslots. Double-check that each talk group uses the correct slot for your repeater – this information is usually available from repeater owners or local DMR groups. Remember that the same talk group might use different slots on different repeaters.
Color code mismatches create complete silence, leading operators to think their radio is broken. Verify color codes carefully, and remember they can change if repeater owners reconfigure their systems. Keep a list of correct color codes for your regular repeaters.
Forgetting to program RX lists means you’ll transmit successfully but won’t hear responses. Each channel needs both a TX contact (what you transmit to) and an RX list (what you receive from). Missing RX lists create one-way communication that frustrates everyone.
Moving Forward with Confidence
DMR programming initially seems overwhelming, but it follows logical patterns once you understand the underlying concepts. Start simple with a few local repeaters and common talk groups. Build your programming skills gradually as you explore the wider DMR network.
Join local DMR groups or online communities where experienced operators share knowledge and code plugs. Most DMR users remember their own initial confusion and gladly help newcomers. Don’t hesitate to ask questions – the DMR community generally welcomes new operators who show genuine interest in learning.
Remember that programming is an ongoing process, not a one-time event. Your code plug will evolve as you discover new repeaters, interesting talk groups, and refined operating preferences. Keep backups of working configurations, document your changes, and don’t be afraid to experiment. With patience and practice, DMR programming becomes second nature, opening access to a fascinating digital communication network that spans the globe.


