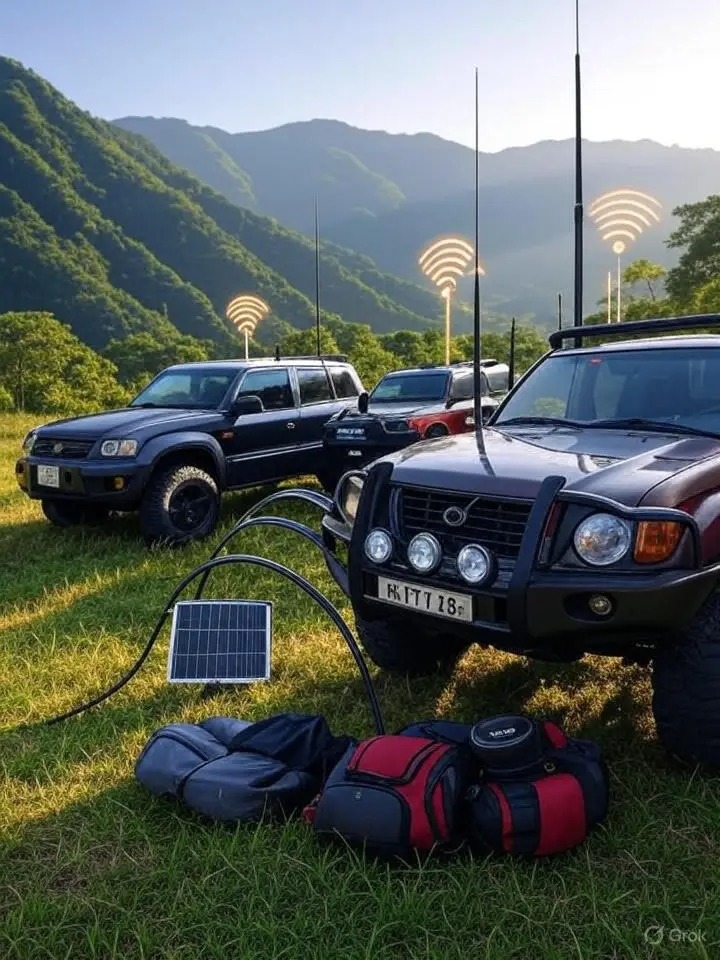
You’re standing at the edge of a soybean field somewhere in central Illinois, holding a folding Yagi at arm’s length, sweeping it left and right. Your Quansheng UV-K5(99) is putting out an unmistakable fast, buzzing FSK tone — digital data, not static. You rotate the antenna another 20 degrees to the right and the signal jumps. There’s a tree line about 400 meters ahead.
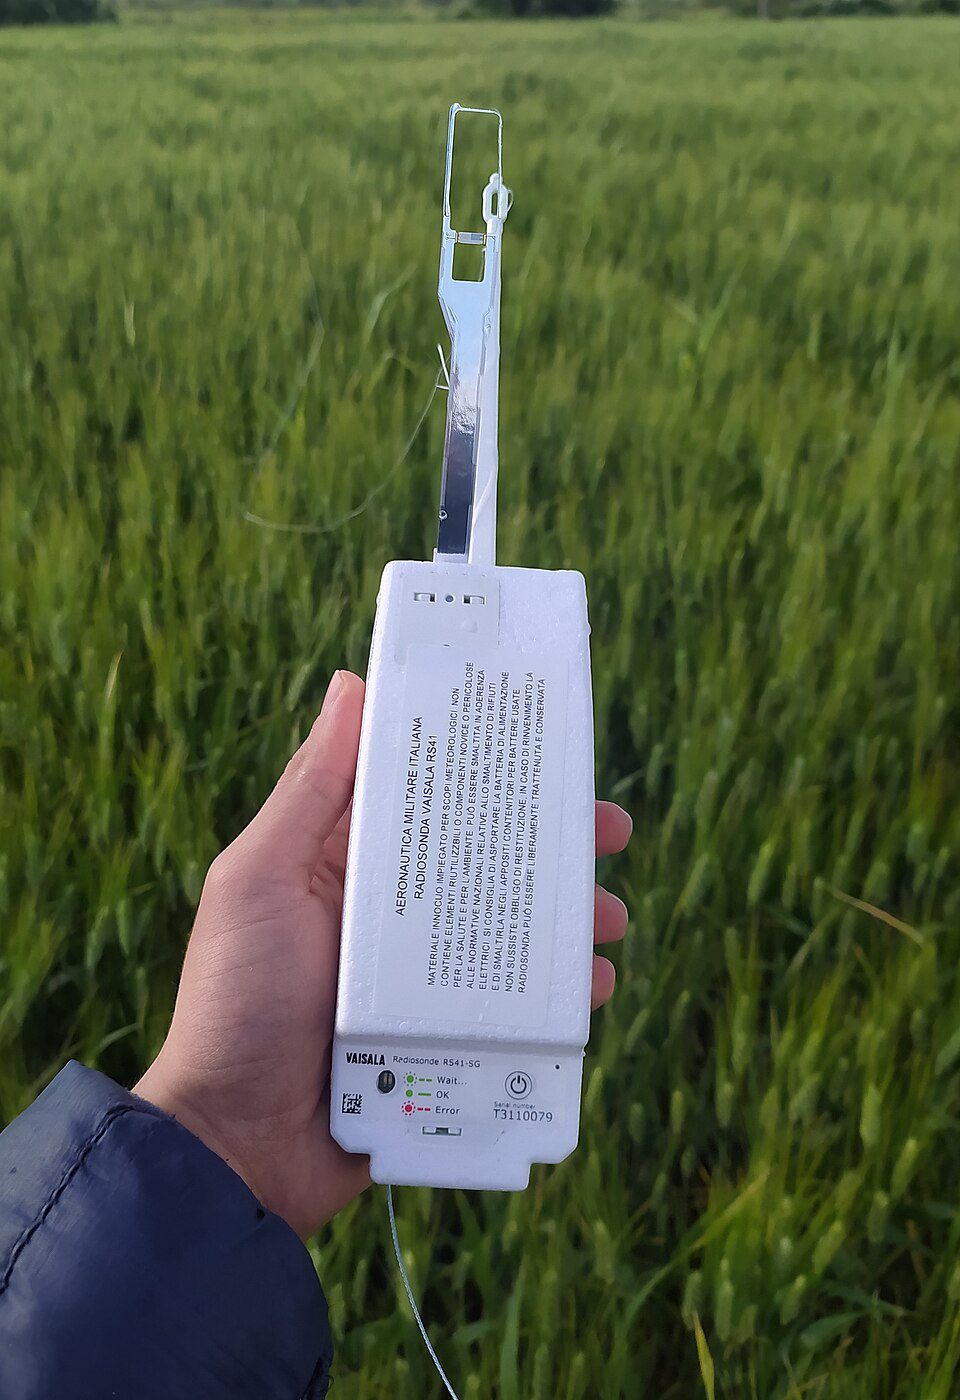
Fifteen minutes later you’re pulling a bright orange foam instrument package out of the upper branches of a cottonwood tree. It’s roughly the size and weight of a large coffee mug. It has a Vaisala RS41 printed in white ink on the housing and a parachute tangled somewhere in the branches above it. It launched from a National Weather Service office six hours ago, rose to nearly 100,000 feet, measured the atmosphere the entire way up, and then rode the remnants of a burst latex balloon back to earth. It’s disposable hardware — the NWS doesn’t want it back.
You found it with a $30 radio and a folding antenna.
That’s radiosonde chasing. Here’s everything you need to do it.
Disclosure: CommsGearReport.com participates in the Amazon Associates program and other affiliate programs. If you purchase gear through links on this page, we may earn a commission at no additional cost to you. Affiliate relationships never influence our technical assessments or recommendations.
What Is a Radiosonde and Why Should You Care
A radiosonde is a small, lightweight instrument package attached to a weather balloon that the National Weather Service launches specifically to profile the upper atmosphere. It measures temperature, relative humidity, and atmospheric pressure continuously during ascent, and derives wind speed and direction from GPS position changes over time. That data gets transmitted back to a ground station in real time on a frequency in the 400–406 MHz meteorological aids band — a government-allocated spectrum block dedicated to exactly this purpose.
The NWS launches radiosondes twice daily from approximately 92 upper-air stations across the United States, once at 00:00 UTC and again at 12:00 UTC. In US local time, those windows fall at approximately 7:00 PM Eastern / 4:00 PM Pacific and 7:00 AM Eastern / 4:00 AM Pacific during standard time — each shifts one hour earlier during daylight saving time. That’s upwards of 180 launches every single day, every day of the year, regardless of weather conditions. This data feeds directly into the numerical weather prediction models behind every forecast product the NWS produces. Radiosondes are not an experimental program — they’re foundational infrastructure.
The balloon is a large latex envelope filled with hydrogen or helium. It ascends at roughly 1,000 feet per minute, reaches burst altitude somewhere between 60,000 and 115,000 feet depending on balloon size and fill, and then the sonde descends on a small drogue parachute. Total flight time runs 90 minutes to two hours. The sonde drifts horizontally throughout the entire flight, carried by winds at multiple atmospheric levels. Depending on upper-level wind conditions, a sonde can land anywhere from 10 miles to well over 100 miles from its launch site.
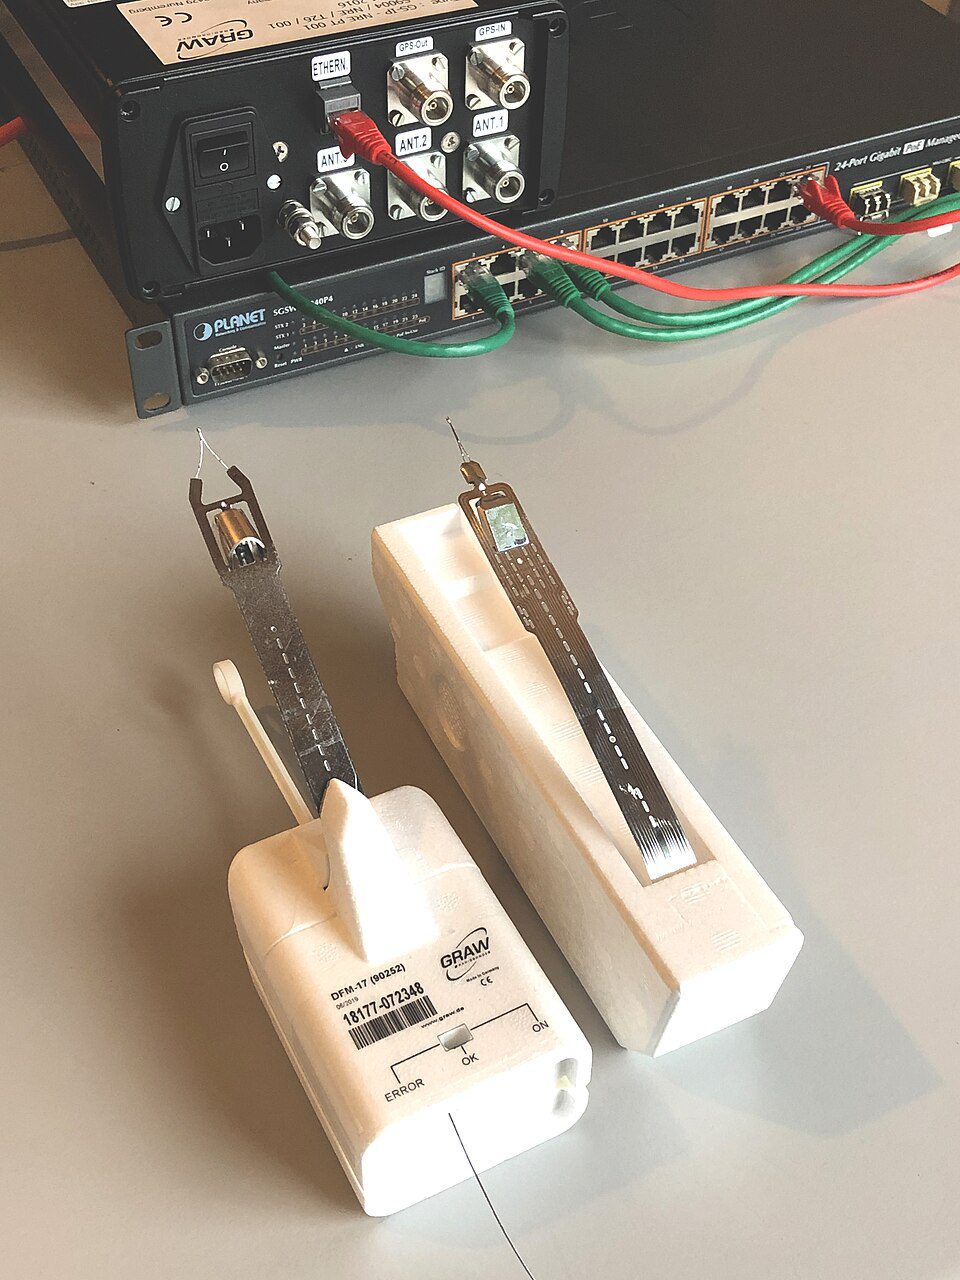
The instrument package itself is commercially manufactured. The most common type in the current US network is the Vaisala RS41, a Finnish-made unit roughly the size of a chocolate bar. The RS41 transmits GFSK-modulated digital telemetry at 4800 baud on a fixed frequency within the 400–406 MHz band. Common US frequencies include 403.000 MHz, 404.000 MHz, 405.100 MHz, and others depending on the station. The Meisei iMS-100 and Graw DFM series sondes are also present at certain US stations and operate on the same band. For a first-time chaser, the specific manufacturer is secondary — what matters is the frequency it’s on and its current GPS position, both of which SondeHub provides for free.
Current NWS radiosondes are treated as single-use disposable hardware. The agency does not operate a return or reconditioning program — once a sonde lands, it’s considered expended. What that means for chasers is simple: if you recover one, it’s yours.
The Honest Case for Chasing
The title of this article promises a hobby that pays you back. That framing deserves an honest treatment before we get into gear.
The payback is not financial. There is no cash reward for recovering a radiosonde and no bounty program of any kind. The sonde is disposable government hardware. Nobody is waiting on it. What you get out of a successful recovery is the object itself and the experience of finding it — which turns out to be more than it sounds.
Radiosonde chasing is a technical scavenger hunt with actual stakes. You’re not hunting a geocache that a human placed last Tuesday in a known coordinate. You’re tracking a scientific instrument that launched before dawn, rode the jet stream for 90 minutes at 90,000 feet, and landed in a field or forest or pond somewhere within a 100-mile radius of an NWS office. The combination of RF direction finding, live GPS tracking, terrain navigation, and physical recovery is genuinely unlike most other amateur radio activities.
The souvenir argument is also legitimate. A recovered Vaisala RS41 is a functional piece of scientific hardware with a documented flight history you can pull up on SondeHub at any time. Many chasers display them. Others in the SDR community have repurposed the RS41’s onboard transmitter hardware for low-power amateur radio applications. The electronics you’re recovering have real technical depth, and for operators who are already engaged with the SDR and radio hobby, there’s genuine interest in having one in hand.
What it is not: passive entertainment. You will drive to fields. You will walk through brush. You will occasionally spend an afternoon on a chase that ends in a river, a private property line you can’t cross, or a battery that died before you got close enough. The chasers who stay with the hobby accept this as part of it. The ones who find it rewarding are the ones who find the chase itself worth doing regardless of outcome.
SondeHub: The Network That Does the Hard Work
Here is the key piece of infrastructure that makes recreational radiosonde chasing possible: you do not need your own receiver equipment to track an airborne sonde. The tracking is already being done for you.
SondeHub (sondehub.org) is a crowdsourced real-time tracking platform that aggregates telemetry data from a worldwide network of volunteer ground stations. These volunteers run RTL-SDR receivers and decoding software that uploads sonde position, altitude, frequency, and telemetry data to SondeHub’s servers continuously while a sonde is airborne. That data is displayed on a public live map accessible to anyone with a browser — no account, no fee, no equipment required to view it.
As a chaser, SondeHub shows you every active radiosonde within coverage of the volunteer network. Click any sonde marker on the map and the detail panel gives you real-time position, altitude, the transmission frequency you’ll need to tune to in the field, and a continuously updating predicted landing zone based on current trajectory and atmospheric modeling. That frequency detail is critical — write it down or screenshot it before you leave the car. As the sonde descends through the lower atmosphere, the landing prediction tightens. By the time a sonde is at a few thousand feet, the prediction is typically accurate to within a few hundred meters — close enough to get you to the right field.
For field use, the SondeHub mobile apps are a better choice than the browser. Both iOS and Android clients are available, including the official SondeHub app and several well-regarded third-party clients. The apps handle background tracking, send notifications when a sonde enters a defined radius, and present the map interface more cleanly while you’re moving than a mobile browser does. Download one before your first chase and spend a few minutes with it at home during a live flight so the interface is familiar before you’re in the field using it under time pressure.
Radiosondy.info is a parallel tracking platform that some chasers prefer for its data presentation and historical flight archive. Both platforms draw from largely overlapping receiver networks. Keep both bookmarked — they complement each other and there are occasional differences in coverage depending on which ground stations are active on a given day.
Coverage gaps are a real limitation and worth understanding. SondeHub depends on volunteer receivers, and coverage is uneven across the country. In some rural areas and parts of the Mountain West, a descending sonde can drop below the horizon of every active receiver before landing, leaving the final ground position uncertain. This is exactly where running your own ground station adds value to both your chasing and the network overall. The home SDR station section below covers how that works.
The Field Chase Kit
This is the minimum equipment required to physically recover a radiosonde: a wideband receive radio, a directional Yagi antenna, and the correct adapter between them. SondeHub on your phone handles all tracking and prediction. Your radio and antenna handle the final approach once you’re on the ground near the predicted landing zone.
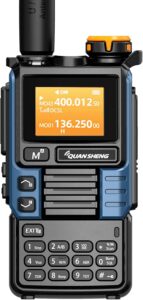
The Quansheng UV-K5(99) is a Chinese handheld transceiver available on Amazon for approximately $25–35. On paper it’s a budget dual-band amateur radio. In practice it’s one of the most capable wideband receive radios available anywhere near this price, and it has earned a genuine following in the SDR and radiosonde chasing communities because of it.
The UV-K5(99) receives from roughly 18 MHz through 1.3 GHz with some architecture-dependent gaps. The 400–406 MHz radiosonde band sits cleanly within its native UHF receive range. Sensitivity in this band is solid for the price — when the Yagi is pointed correctly at an active sonde, you will hear the signal clearly. The RS41’s FSK telemetry produces a fast, regular buzzing tone that is completely distinct from background noise and instantly recognizable once you’ve heard it.
What the UV-K5(99) does not do is decode the telemetry. The data you’ll receive at audio output is the raw FSK modulation — you’ll hear the sonde and use signal strength to determine direction, but the radio is not outputting GPS coordinates or decoded sensor data. That layer comes from SondeHub. The UV-K5(99) is your direction-finding instrument for the final approach, not your tracking computer. Those are two different jobs and they use two different tools.
For operators who already own a Baofeng UV-5R, the UV-K5(99) is a better tool for this application in every meaningful way. The receive coverage is wider, the architecture is more modern, and the community firmware ecosystem is significantly more capable. If you don’t already own a UV-5R and you’re buying specifically for radiosonde chasing, go directly to the UV-K5(99).
On custom firmware: The UV-K5 platform supports several community-developed firmware builds. The most widely used is the open-source firmware maintained at github.com/egzumer/uv-k5-firmware, which adds a spectrum analyzer, extended frequency coverage refinements, and UI improvements over the stock Quansheng software. The spectrum analyzer is directly useful for radiosonde work — you can sweep the 400–406 MHz range visually and identify active sonde frequencies before tuning to them manually. Installing custom firmware requires following the instructions in that repository and comes with the standard caveats about a $30 radio and its warranty. It is not required to chase. It is worth knowing about.
On field power: The UV-K5(99) runs on a single 1500mAh Li-ion cell, and that runtime shrinks noticeably in cold weather. A chase involving a long drive plus a walk through terrain can consume most of the battery before you reach the DF phase. Carry a USB power bank and make sure the radio is fully charged before you leave home. The UV-K5(99) charges via USB-C, and a quick top-up in the car during the drive to the search area is a sensible habit.
On licensing: The UV-K5(99) is a transmit-capable radio. Receiving radiosondes on the 400–406 MHz meteorological aids band requires no license of any kind — this is a receive-only activity on a non-amateur frequency allocation. However, if you transmit on amateur radio frequencies using this radio, FCC regulations require that you hold at minimum a Technician class license. Know which mode you’re operating in.
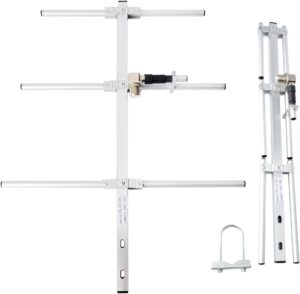
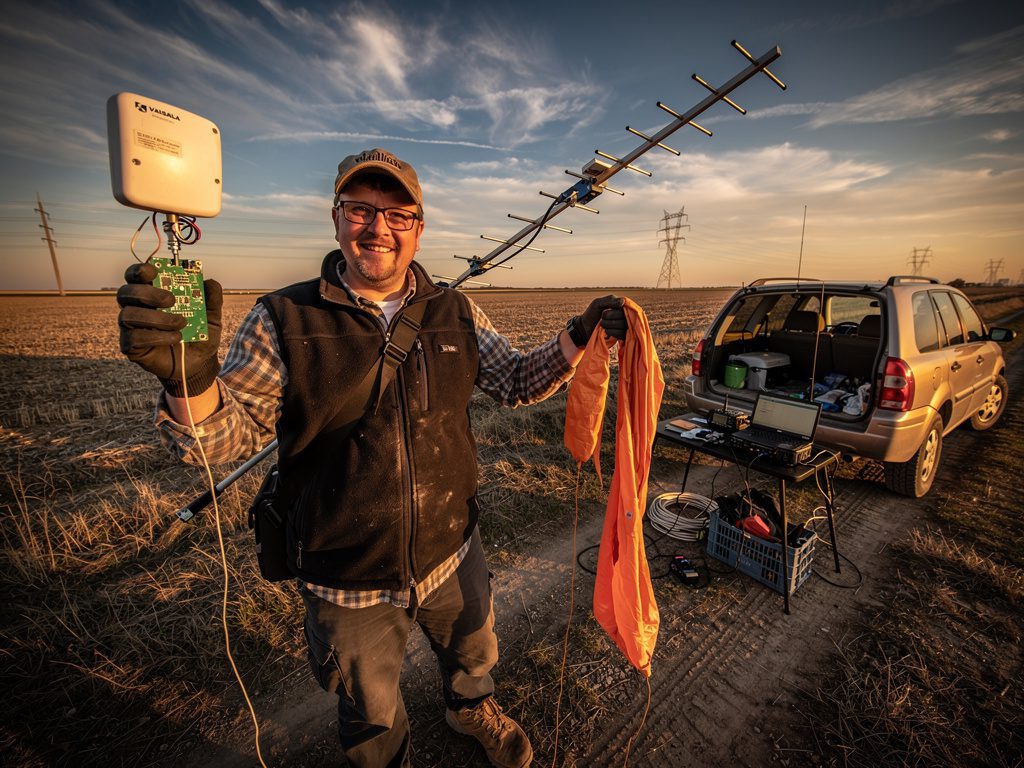
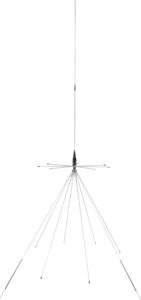
The TWAYRDIO Foldable Yagi covers 400–470 MHz with practical gain in the 6–9 dBi range. The radiosonde band at 400–406 MHz sits at the low end of this coverage window, and the antenna performs well there. For ground-level direction finding at radiosonde frequencies, this is exactly the right tool.
The foldable construction is the feature that matters most for field use. This antenna collapses to a package that fits in a day pack, a gear bag, or the back seat of a car. In a recovery scenario where you’re walking half a mile across a field or through a tree line, a collapsible Yagi is significantly more practical than a rigid boom antenna. You unfold the elements at the search area, connect the pigtail, and start sweeping. Setup takes about 30 seconds.
Polarization matters. Radiosondes transmit with vertical polarization, which means the antenna elements should be oriented vertically — perpendicular to the ground — when you’re direction finding. Hold the Yagi so its elements form a vertical plane rather than a horizontal one. Arriving at a search area and sweeping with the antenna rotated 90 degrees is a common first-timer mistake and will cost you several S-units of signal strength. Get the orientation right before you start sweeping and the signal will be immediately obvious.
Using it in the field follows a straightforward process. Orient the Yagi toward the area indicated by your last SondeHub position fix and listen for the FSK signal. Rotate the antenna slowly in the horizontal plane and note the direction of maximum signal strength. Walk that bearing. Stop every 50 to 100 meters and re-establish direction. The signal will get progressively louder as you close distance. At around 50 meters from a transmitting sonde, switch from peak-finding to null-finding for precision: point the back of the Yagi toward the sonde instead of the front. The rear null of a Yagi is significantly tighter than the broad forward lobe — rotating until the signal disappears behind the antenna gives you a sharper directional indication than trying to find the center of the wide front peak. Radiosondes on the ground are not quiet; you will not have trouble hearing one when you’re close.
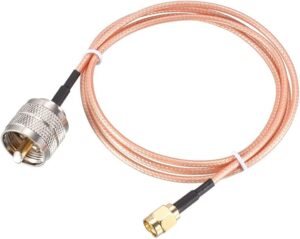
The UV-K5(99) uses an SMA-Female antenna port, which accepts an SMA-Male connector. The TWAYRDIO Yagi’s feedpoint is an SO-239 (UHF Female), which accepts a PL-259 Male. These connectors are not directly compatible. The correct adapter is a coax pigtail with SMA-Male on one end and PL-259-Male on the other — specifically the Bingfu RG316 version in 50cm length.
The 50cm length is deliberate. A shorter pigtail locks the radio and antenna into a rigid geometry that doesn’t work when you’re sweeping through brush, adjusting your grip, or trying to read signal strength while moving. Twenty inches of cable gives you enough slack to hold the Yagi in one hand and operate the UV-K5 with the other without the cable pulling tension on either connector. For operators who prefer to run the radio clipped to a chest harness or vest pocket while sweeping the Yagi two-handed, the 100cm version of the same Bingfu pigtail is the better choice for that operating style.
One practical note worth including in your pre-chase checklist: verify the connector configuration on your TWAYRDIO antenna when it arrives before your first chase day. Amazon listings for multi-variant antenna products occasionally ship configurations that differ from the standard listing. The SO-239 feedpoint is the most common configuration for this antenna, and the Bingfu pigtail described here addresses it correctly. If yours is different, the fix is a different $10 pigtail — not a problem, but not something you want to discover in a field 40 miles from home.
The Optional Layer: Running a Home SDR Ground Station
Everything in the field kit section above gets you into the chase. This section covers a different participation mode: running a fixed home receive station that decodes radiosonde telemetry and uploads it to SondeHub in real time. This is how the tracking network you depend on for chasing was built, and running a ground station is how you contribute to it.
This is optional. It is not required to chase. But if you live in an area with sparse SondeHub coverage, running your own station directly improves the landing predictions available to you as a chaser — which has a very practical payoff.
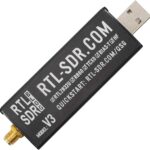
The RTL-SDR Blog V3 is the community standard SDR dongle and the correct starting point for a radiosonde ground station. It retails on Amazon through the RTL-SDR Blog storefront for approximately $30–35. It uses the Raphael Micro R820T2 tuner and a modified RTL2832U demodulator with a direct-sampling circuit that enables HF receive capability — though for radiosonde work at 400–406 MHz you’re using the standard superheterodyne front end and the HF capability is not relevant here.
For monitoring and decoding balloon telemetry at 403 MHz, the V3 is fully capable. Radiosondes are not weak-signal targets — a balloon at 80,000 feet with a clear line of sight is a strong signal, and the V3 has no trouble receiving it. The V4 improves certain performance characteristics meaningful for weak-signal HF and other specialized applications, but those improvements don’t translate to a practical difference in radiosonde receive performance. At the current pricing differential of roughly $35 versus $70, the V3 is the honest recommendation for this use case.
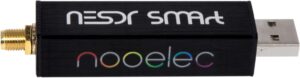
The Nooelec NESDR SMArt v5 is a confirmed Amazon-available alternative using the same R820T2 chip at a comparable price. It’s a valid substitute if the V3 is out of stock.
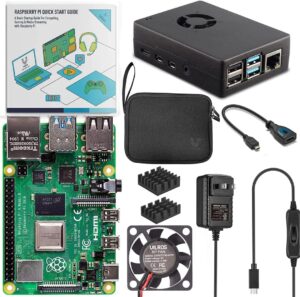
The standard platform for a dedicated auto_rx ground station is a Raspberry Pi 4. The 2GB model handles auto_rx with one or two RTL-SDR dongles without difficulty. The 4GB version gives you headroom if you want to run additional services or expand the station later. Raspberry Pi 4 availability and pricing on Amazon has historically fluctuated — expect somewhere in the $45–80 range and verify current availability at purchase time.
auto_rx: The Decoding Software
auto_rx is a free, open-source Python application that handles the complete pipeline from raw RTL-SDR samples to decoded telemetry to SondeHub upload. The project is maintained at github.com/projecthorus/radiosonde_auto_rx. It scans the 400–406 MHz band automatically to identify active sonde frequencies, decodes telemetry from the RS41, RS92, DFM series, M10/M20, iMet, LMS6, and most other sonde types currently in operational use, and uploads decoded position data to SondeHub continuously without manual intervention.
Installation requires basic Linux familiarity — editing a configuration file, connecting the RTL-SDR dongle, and running an install script from the repository. The documentation is thorough and the SondeHub community maintains an active Discord server where setup questions get answered quickly.
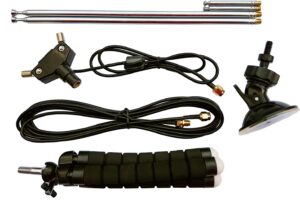
For a fixed home ground station, an omnidirectional vertical antenna covering 400–406 MHz with a clear sky view above the horizon is all you need to start contributing useful tracking data. Rather than building a DIY ground-plane vertical from hardware store materials, the RTL-SDR Blog Multipurpose Dipole Antenna Kit is the practical Amazon purchase here — it retails for approximately $20 through the RTL-SDR Blog Amazon storefront and is purpose-built for exactly this kind of SDR receive application.
The kit ships with two telescoping stainless steel antenna elements, a magnetic mount base, a suction cup mount, an adjustable tilt base, and a length of coax with an SMA connector that mates directly to the V3 dongle already in this kit. The elements are adjustable, which is the key feature for radiosonde work: set each element to approximately 18.6 cm — one quarter-wavelength at 403 MHz — mount the antenna vertically on a windowsill or exterior surface with a clear sky view, and the geometry gives you a vertically polarized omnidirectional pattern that matches the sonde’s transmission polarization. This is not an approximation or a workaround; a quarter-wave vertical with a ground plane is textbook antenna design for exactly this frequency range, and the RTL-SDR Blog kit executes it correctly.
How a Chase Actually Works: Start to Finish
Detecting the Flight
Open the SondeHub app on your phone at or just after the standard launch windows — 00:00 UTC (around 7 PM Eastern, 4 PM Pacific in standard time) and 12:00 UTC (around 7 AM Eastern, 4 AM Pacific). Look for active sondes within reasonable driving distance. Tap any sonde marker on the map and the detail panel shows you current position, altitude, the transmission frequency you’ll need in the field, and a projected landing zone that updates continuously as the sonde descends.
Evaluating the Chase and Timing Your Departure
Not every flight is worth committing to, and there’s no urgency to leave the moment a sonde appears on the map. During ascent the landing prediction can shift significantly — a sonde at 80,000 feet with a prediction 60 miles away may move another 20 miles before it descends into terrain you can actually reach. The smart move for most flights is to watch the prediction through the ascent phase and wait until the sonde has burst and is descending before you commit to a drive. Once it’s below 20,000 feet and descending, the prediction is usually stable enough to navigate toward with confidence.
When evaluating whether to chase, work through a quick mental assessment: How far is the predicted landing zone? Is the terrain accessible — open fields and farmland versus dense forest, mountains, or open water? Is the prediction stable or still shifting? How much flight time remains? Experienced chasers develop intuition for this quickly, and being selective improves your recovery rate more than any gear upgrade.
The Drive
Navigate toward the predicted landing zone while monitoring SondeHub for prediction updates. If there’s a passenger in the vehicle, have them operate the phone — tracking while driving is genuinely dangerous and not worth it. In the final few thousand feet of altitude, the landing zone typically settles to within a few hundred meters of actual touchdown. Your job during the drive is to get as close to that zone as road access allows.
Getting to the Search Area
Park as close to the predicted landing zone as you can reach by road. Step out and assess the terrain before doing anything else. Is it a harvested corn field, a woodlot, a residential neighborhood? Are you on public land or private property? If private, you need permission before entering. Most rural landowners in the US are cooperative when you explain what you’re doing — “I’m trying to recover a government weather balloon that just landed on your property” is a reasonable conversation opener. The sonde has NWS markings on the housing, which helps establish legitimacy when you need to knock on a stranger’s door.
The RF Direction Finding Phase
This is where your field kit takes over from SondeHub. Before you leave the car, tap the sonde marker on SondeHub one more time and confirm the operating frequency — it will be listed in the detail panel, typically somewhere in the 400–406 MHz range, most commonly around 403 MHz. Tune the UV-K5(99) to that frequency. Unfold the TWAYRDIO Yagi, orient its elements vertically, and connect it to the radio via the Bingfu pigtail.
Sweep toward the approximate area of the predicted landing position. You should hear the FSK signal within seconds if the sonde is still transmitting — a rapid, regular buzzing or chirping data tone that is completely distinct from anything else on this part of the spectrum. Rotate the Yagi slowly in the horizontal plane, sweeping left and right, and identify the azimuth of maximum signal strength. That’s your bearing. Walk it. Stop every 50 to 100 meters, sweep again, re-establish the bearing.
Be aware of battery state. The RS41’s onboard transmitter runs on a lithium battery with a limited life after landing — typically in the range of two to three hours depending on temperature, with cold weather shortening that window considerably. If you’ve arrived late to a chase or conditions have been cold, you may find a sonde that has already gone silent. When that happens, navigate to the last confirmed GPS fix on SondeHub and search visually from there. The sonde doesn’t move after landing, and SondeHub’s last logged position is usually within a few hundred meters of the actual touchdown point. Switch from RF direction finding to terrain search mode and start looking for the housing and parachute with your eyes.
When the signal is still live and you’ve closed to within roughly 50 meters, switch from peak-finding to null-finding. Point the back of the Yagi toward the signal source and rotate until the signal drops to its deepest null. The rear null is significantly narrower than the broad forward lobe, giving you a much more precise bearing at close range. When the signal is loud enough that the S-meter is pegged regardless of antenna direction, you’re within a few meters and it’s time to search visually.
Visual Recovery
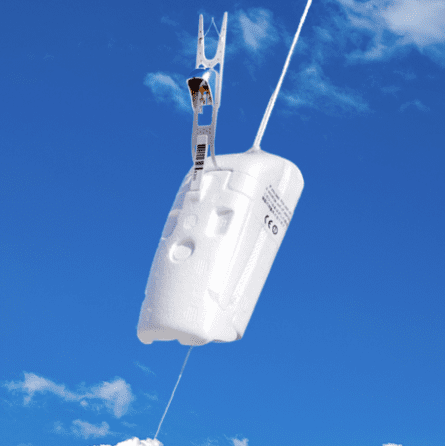
Radiosondes are designed to be found. Most are housed in white or bright orange-yellow foam — the Vaisala RS41 uses a white housing. The parachute is typically a brightly colored nylon canopy, often orange or red. If the sonde is in a tree, look for the parachute first since it’s larger and more visible than the instrument housing. On the ground in a field, look for the payload string — the cord connecting the sonde, parachute, and burst balloon remnant — which may be spread over a significant area.
What to Do With the Sonde Once You Have It
The short answer is: whatever you want. The NWS treats these as disposable hardware, the flight is complete, and no return program exists. There’s no mailer, no reconditioning facility, and no agency expectation beyond the fact that you shouldn’t leave lithium batteries in the environment.
Start by inspecting the condition of the unit. The housing is usually foam — white on the RS41 — and holds up reasonably well to landing impact, but the sensor boom extending from the housing is more fragile and commonly bent or broken on harder touchdowns. Note the serial number if it’s legible; some chasers log their recoveries on SondeHub as part of the hobby.
Display is the most common destination. A recovered RS41 makes a legitimate conversation piece, and for operators already engaged with the SDR and radio hobby there’s something satisfying about having the hardware in hand — the thing that was at 90,000 feet this morning is now sitting on your shelf. The complete flight track is logged permanently on SondeHub and you can pull it up at any point, which adds real context to the object itself.
Repurposing the electronics is a legitimate option with a documented following in the SDR community. The RS41 uses a Silicon Labs Si4032 transmitter IC, and the hardware is well-documented enough that various operators have adapted the onboard transmitter for amateur radio applications including WSPR beacons and low-power position tracking experiments. An independent open-source RS41 firmware project at github.com/df8oe/RS41HUP provides a starting point for anyone interested in going further with the hardware. This article won’t chase that thread down, but the hardware has real depth if you’re inclined to explore it.
Mark the recovery on SondeHub. Once you have the sonde in hand, it takes about 30 seconds to close the loop on the tracking data. Open the SondeHub site or app, locate the flight in the database by its serial number or by tapping the marker, and submit a recovery report. You’ll need a free SondeHub account to submit the report — worth creating before your first chase rather than at the search site. Marked recoveries contribute useful ground-truth data to the network and are visible to other chasers and the wider SondeHub community.
If the unit is damaged beyond any useful purpose, dispose of it responsibly. The housing is foam and the electronics package includes a small lithium battery — follow standard battery disposal practice and don’t landfill the battery attached.
Radiosonde Chasing vs. Amateur High-Altitude Balloon Chasing
These two activities get conflated regularly and the distinction is worth making clearly.
NWS radiosonde chasing is the activity this article covers: recovering instrument packages from government weather service flights operating on the 400–406 MHz meteorological aids band, tracked via SondeHub through a crowdsourced volunteer receiver network.
Amateur high-altitude balloon (HAB) chasing is a different activity involving payloads launched by amateur operators, typically tracked via APRS on 144.390 MHz in the US or through dedicated HAB platforms like HABHUB. HAB launches are community events, announced in advance, with known launch coordinates and point-of-contact information for the operating team. There is no equivalent advance notice for NWS radiosonde launches from a chasing perspective — those flights follow a fixed schedule and the community simply monitors SondeHub to see what’s airborne.
The field skills overlap significantly. Directional antenna work, terrain navigation, and the physical recovery process are essentially identical. The tracking infrastructure, frequencies, and operating modes are not. HAB operations involve transmit-capable amateur station equipment and require a Technician license minimum for the operators. Radiosonde chasing is receive-only and requires no license.
If the combination of SDR monitoring, field operations, and high-altitude balloon work interests you beyond NWS radiosonde chasing, HAB is the natural next step. It’s its own complete hobby with its own infrastructure, community, and technical demands — and a Technician license is a reasonable prerequisite to start exploring it seriously.
Your First Chase: What to Expect
Go in with calibrated expectations. Your first chase will almost certainly be an educational experience rather than a clean recovery. Prediction accuracy varies by region depending on volunteer receiver density in your area. The sonde may land on inaccessible private property. It may land in a pond or creek. It may land in terrain you can’t safely navigate. The battery may go dark before you’re close enough to DF it.
None of that is failure. That’s the hobby behaving exactly as described. Every experienced chaser has a list of the ones that got away and they remember those missions as clearly as the recoveries.
Create your SondeHub account before your first chase, not at the search site. Download the SondeHub mobile app and spend a few minutes with it during a live flight at home so the interface is familiar before you need it in the field. Confirm your connector configuration on the TWAYRDIO Yagi when it arrives. Charge the UV-K5(99) the night before. These are small things, but first-chase failures are disproportionately caused by avoidable preparation gaps rather than the actual difficulty of the activity.
The operators who stay with radiosonde chasing long term are the ones who find the combination of tracking work, RF direction finding, terrain navigation, and field recovery genuinely satisfying as an activity in itself — independent of whether they walk out holding a sonde or not. That orientation produces better chasers faster, because it keeps you going when the first three attempts end in a river or a fence line.
When the recovery does happen, and it will, the specifics tend to be memorable in a way that’s hard to anticipate in advance. The signal getting louder as you sweep. The moment you spot the orange foam in the grass. The weight of the instrument in your hand and the awareness of where it’s been. It launched before you were awake this morning, measured the stratosphere at 90,000 feet, and rode a burst balloon to the ground. You tracked it across 60 miles and walked in on it with a folding antenna and a $30 radio.
That’s the payback. It’s better than money.